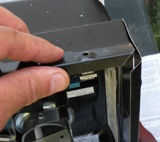
Replace Your RV Water Heater yourself...
Though, it may take a few whacks with a boot to your Brain Pan to get the sucker out of Neutral...
Like the guys who built your rig are often afflicted... but I wander off on another tangent. Let me start from the beginning.
My RV water heater was leaking and I couldn't spy where it was leaking from. That combined with it being eleven years old and it having a "Fixed/non-adjustable" temperature thermostat that had gone to running excessively hot... had me deciding to replace rather than repair ~ and cut my losses and frustration.
I looked around and they wanted $600 bucks and more for this lil' 6 gallon RV Water Heater! Actually the one we had also had an electric element that we have never used. Boondocking you can't really run a 110 Volt heater very efficiently! :)
So... opting for the LP ONLY model cut another $40 bucks or so off the price... and then I found a SALE at PPL RV... Got the Atwood RV Water Heater for $338 bucks and Free Shipping! Suh-Wheet!
*I'm trying something different for pages like this one, starting with this page. I've thumbnailed most of the pics. If you want to see a larger pic just click on the one you want to enlarge and it will pop up in another window.*
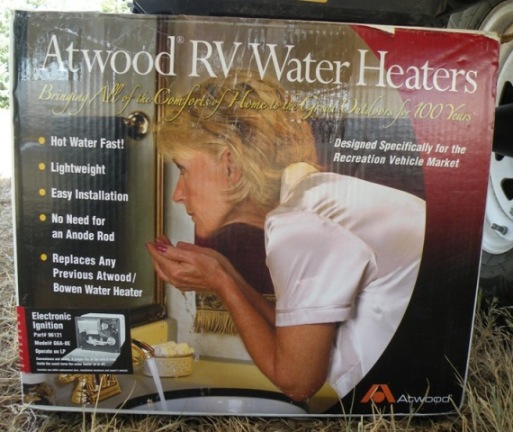
The RV Water Heater arrived in Fort Collins a week later and we rendezvoused down there from our camp in the High Country to do the swap.
When you first look at the thing; if you've never got into such a job before you might be intimidated. What with wires and water lines and propane lines...
I contend that if you can run a 20,000 lb rig down the road without taking out half the road signs along the way you should be able to do this job safely and well!
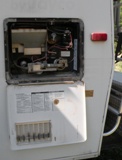
Here's the thing... The PRO's who built My rig for instance... did the original Installation WRONG! Took me eleven years for it to fail (Weirdly it NEVER should have worked!) The point is... if you pay attention to what you're doing, you can save yourself a bundle of cash... AND... have your RV Hot Water Heater installed correctly.
Considering that the PRO's had built the belly of this Old trailer WRONG , Improperly remounted the shocks during my Axle flip, Welded my Hitch Repair By God AWFUL up in Yellowstone and now I've caught 'em having plumbed my RV Water Heater WRONG...
...I'm not so sure that hiring some so called pro beats an amateur taking his time and doing it right! :)
So! The first thing to do is empty the RV Water Heater Tank.
Make sure the heater is off!
Make sure all 110V power to it is OFF!
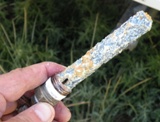
Then just remove the drain plug... In my case I had a sacrificial anode/valve which was so plugged up it wouldn't drain!
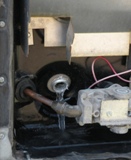 Now you just go to disconnecting and unhooking everything.....
....Uh... You didn't start yet did you?
I'd go and make sure the propane is shut off at the bottles first... unless you're the sort that wants to experience the Big Bang theory... up close and personal!
Now what this means is... You have to work quickly...
~ OR ~ you have to run your refrigerator on Electricity while you make the swap. ~IF ~ you plug in and run electric MAKE SURE that you have the power to the RV Hot Water Heater shut off and blocked... so you don't have any Unintended Consequences!
Now on to takin' things apart.
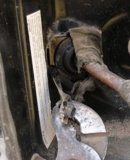
The propane line is going to run out through a grommet in a hole in the case of the heater.
That'll usually be sealed up with a good layer of some variety of sealant as well.
You have to just peel that out of there to free up the line. I cut it with a utility knife and then drug it out with a pair of pliers.
With that uncovered you'll need to cut that grommet with a utility knife to get it out of the way.
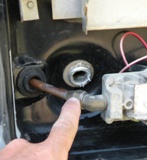 Then, double check to make sure the propane is OFF! and Now you can Disconnect the propane line.
Next is to disconnect the water lines from the rear of the NOW EMPTY water heater.
The tank will usually hold a bit of water that is going to run out when you disconnect the lower line. You'll want to have a pan to catch that water if you can.
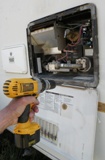 With ALMOST everything disconnected you can go out and remove all the screws securing the RV Water Heater case into the body of the RV.
When you've got the screws all out, pull the unit forward a couple of inches. Clear the gas line through the hole and gain access to the wiring that goes into the top...
Right here I had a brain F@%T and forgot to snap a pic of the top of the Old tank... DOH! :)
The new RV Water Heater should look like this...
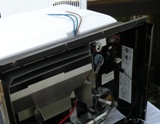 On top of the tank you should have those three wires that connect the 12V side of your RV system to the heater.
The colors of the wire coming from the trailer don't usually match the colors of the wires coming from the Hot Water Heater.
...so... What I did was clipped those wires off on the RV side of the splice.
That way I had a color key I wouldn't forget when I hooked the new unit in. When the time comes you can just re-attach using the color code of those clipped bits as your guide.
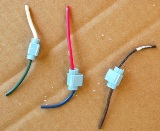 Also, on the very back of the tank is the box where the 110 Volt connection is made. You'll disconnect that line as well. I just wire nutted, taped and coiled up that wire since I was not going to buy or reinstall a system I'll never use for Boondocking.
Everything should be free now so remove the bad RV water heater and try to think of inventive ways to reuse that tank for something! :)
You have to do a lil' prep work on the New Unit's frame to ready it for installation. You have to bend up the edges all the way around. It's an easy enough task with a pair of channel lock pliers. Just set the jaw on the fold line and gently work your way across until the whole side is bent 90 degrees.
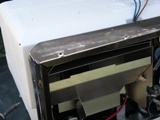
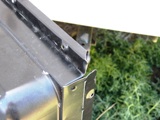
Slide the new tank in place and partially into the opening. I did this alone but having another set of hands to help thread that propane line through the hole would be helpful! ... uh ... you'll need to remove the NEW grommet that should be filling the propane line hole in the heater case... first!
While you still have access resplice the power wires. Rather than those clip type units I chose to tightly wire nut the wires and electrical tape those to ensure durability with all the vibration of a rig.
Place your new caulking or whatever sealant you choose to seal the case to the body and push the unit the rest of the way into place.
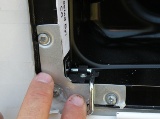 I didn't put all the screws back in to secure it yet...
...just in case there was some unforeseen issue... I only sunk in the screws out at each corner along with the corner bracing pieces.
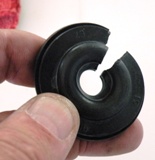 When the gas line is through the whole, because it's already been flared and the grommet won't fit over it you'll need to cut one side of the new grommet to slip around the gas line.
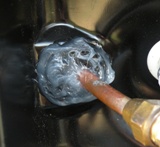
Work the grommet into place and then coat and seal it with a suitable rubber/silicone sealant after you reconnect the gas line.
The idea is to prohibit any sort of a gas leak into the interior of the rig. I used an auto/marine sealant rated for fuel and petroleum products.
Now... the unit is in place. The gas line is connected and all is sealed right? Let's test the line for leaks... So turn the gas back on! You might even want to fire the fridge back up!
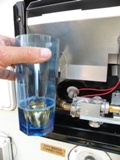

I just use the old way of a lil' dish soap in a bit of water. I take a spoon and dump a bit on the joint I'm testing and watch for bubbles... No bubbles? No leak!
With no leaks go ahead and replace the rest of the perimeter frame screws.
Where you bent that case over to prepare it for mounting you'll see that it's perforated along that bend line. You need to go in there with more of that sealant you used on the grommet and run a bead of sealant over that "bend line" and seal those perforations so that neither moisture or gas can penetrate your RV.
At this point I hung the new door on the case and I was pretty much done outside... So... I tested the gas line for leaks a second time...
... and went inside to reconnect the RV Water Heater water lines inside...
THIS is where after some frustration and gyrations it FINALLY sunk in... It took me a while to take my own brain out of Neutral and realize that The Morons at Jayco (sorry Jayco ~ But it's True!) had plumbed my water heater, way back in 2001, IMPROPERLY, with compression fittings!...
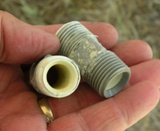
Those straight compression threads will NEVER seal up when fitted into the 1/2" NPT threads that are in the RV Hot Water Heater... So... how they DID for the past eleven years is a mystery to me! But now... they're replaced with more proper, heat rated PVC plastic nipples with proper NPT threads and Shark Bite fittings.
You really want to make the connection with a plastic nipple if your tank, like the Atwood I installed, is aluminum.
If you connect dissimilar metals there's a chemical reaction that causes some pretty bad corrosion in a rushin' hurry. Making that connection with plastic eliminates that brass or steel or copper to aluminum corrosion difficulty.
 So now the RV Water Heater water lines are hooked up, the gas line is hooked up and tested... the electrical is hooked up and secured... the case is secured in place... time to turn on the water pump and fill the tank... and watch for water leaks...
... No leaks? ... Well then... with a full RV water heater tank close your eyes... scrunch up your face and sink your head down tween your shoulders and push the water heater Ignite button as you cringe! ;)
No Big Bangs? :) HooooooWheeee! We got us a New RV Water heater!
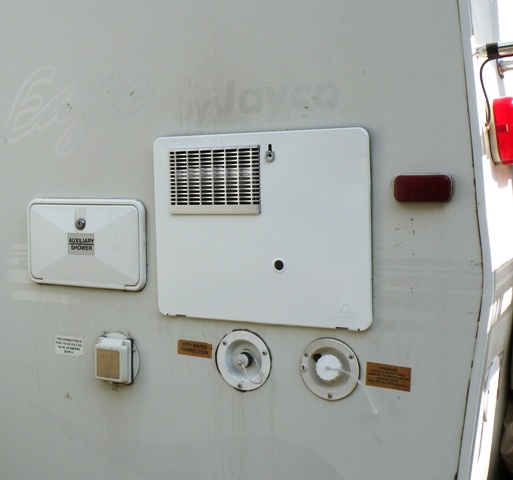
See? That wasn't so hard was it? and I guarantee, a shop would have charged you FULL boat on the price of the RV water heater and then a couple hundred more for the install itself... and if you don't know the guy doin' the work to certify his ability... you can't be certain sure he done it right! I've been disabused by 'em too many times!
Happy Hot Showers!
Return from RV Water Heater to Goin' RV Boondocking
Fiction
Jeb Taylor Western Series
Volume #1
NEW!
Released July 2012
Volume #2


