Make an RV Tank Repair... In Place... Don't Replace Your Leaking RV Tanks!
...but it can sure beat the hassle of completely removing and replacing a broken RV Waste tank!
It may not be something you really want to do for fun, and it's unlikely gonna be something you look back on as enjoyable, but it is a hell of a lot cheaper than paying somebody else to do it!
This past spring, as we started to pull out for a short circle with our Jayco Eagle... it became real clear... we had a problem... when a couple of gallons of Sewage came pouring out of the belly of the rig, when I pulled it down off the leveling blocks... and it went "off level".
Buuuut, I'd been blaming it on a dog! ... oops! Sorry 'bout that Buck! :o)
His innocence was made real clear by the "Stuff"... leaking out of the belly...
Well... after that initial leak when I first moved the rig, the leak stopped as I towed down to a dump station.
It didn't start back up, or re-occur... on that short circle we were committed to... so I was able, to postpone the RV Tank Repair, for a few days... though, without the roof vent and window open in the bathroom... we couldn't lose that "Sweet" aroma! :o)
But, knowing that there was a problem, somewhere, I started the RV Tank Repair job, that next week, after our return from that short trip.
The first part of the job being to remove the belly pan, and the contaminated insulation from below the RV Waste Tanks.
You can see, in this next pic... just to the right of the dump port... the belly pan seam... from whence came the "Leakage"! :o)
... That made this RV Black Tank Repair a requirement!
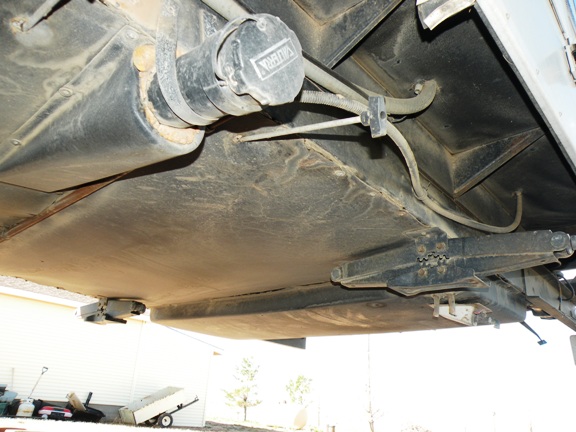
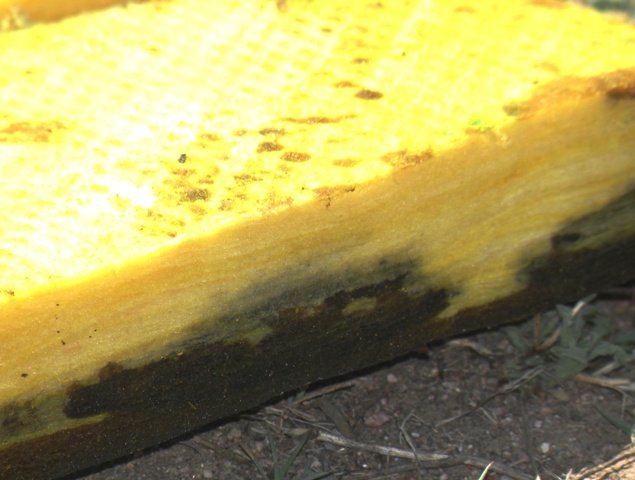
Kinda rank, ain't it? No way to save that insulation... just rip it out... and stuff it in a dumpster!
That the tank quit leaking after the initial 'surge'... and didn't repeat after I dumped had me thinking the failure was in the Inlet pipe on top of the tank...
However... once I stripped the belly pan and could make a full inspection of the tank, I discovered the failure was a crack that had developed around the flange where the Dump Pipe is connected to the face of the Black Tank.
It still required an RV Tank Repair... but the failure being on the bottom of the tank... and not the top, made it a whole lot easier!
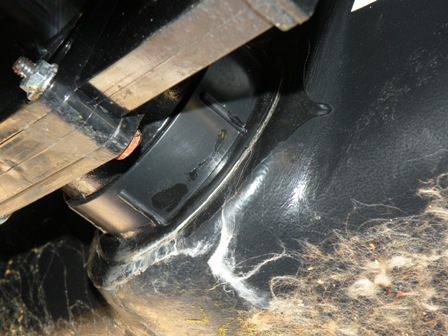
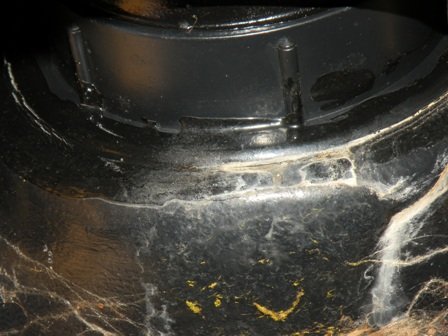
The crack starts where you can see the white residue, around the edge of the flange, where it's cemented to the face of the tank.
Apparently, when the tank was completely full, the weight in the tank, put enough pressure on the crack to open it up, andlet it seep... That 'seepage'... had saturated the insulation I'd installed during the repairs a few years ago, after the Mouse invasion... That insulation was holding an unknown number of gallons of 'sewage'... and was the source of the 'aroma' we'd started smelling.
Once it was saturated... it started pooling in the center of the belly pan... when the rig went off level as I moved it... It ran out the seams... revealing, for once and for all... My "Problem"...
Not a Nice thing!
But, what kind of RV Tank Repair should I do? Should I just Replace the whole black tank?... That requires all the hassle of taking the toilet loose... getting measurements and finding a suitable replacement... waiting while it's shipped in... and paying for the dang thing...
It didn't take much in the way of cogitation to calculate that making an RV Tank Repair, in place, is a much better option! Better in time, better in Cost... and better in the reduction of Stress!
But... how could I repair a plastic tank? The stuff is notoriously difficult to work with. It seems nothing wants to adhere to it. There are outfits that do "Plastic Welding"... but they're hard to find... and you either have to go to them... or pay them to come to you...
My answer was to roll down to a local hardware store... and simply walk around... scouting all their "Stuff"... looking for something to jump out at me... and say; "I'm the Solution!... I will make your RV Tank Repair work!"
It was in their adhesive section that I discovered just what the RV Doctor ordered.
Epoxy!
They make a whole variety of epoxies, for different purposes... and one... specifically that met my needs. It's an epoxy formulated, specifically, for Hard Plastics... and ABS, the material most RV Black Tanks are made of... is definitely... a Hard Plastic!
But... just sloppin' a wad of epoxy on there is NOT gonna make a durable RV Tank Repair... leastways not in my mind. I was fretful that the vibration and movement of an RV would simply, re-crack the epoxy repair. I needed a more complete solution... and good Ol' Ace Hardware had that too... over in their Automotive Section.
Fiberglass Cloth!
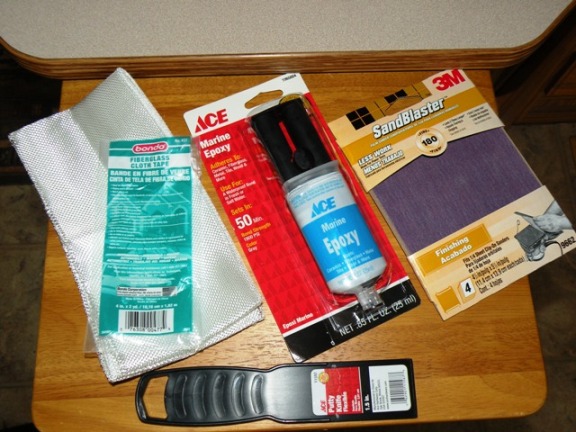
I cut some of the Fiberglass cloth into smaller, more manageable strips to apply for this repair... and used an epoxy, labeled slightly different... when I ran out of the first tube! :o)
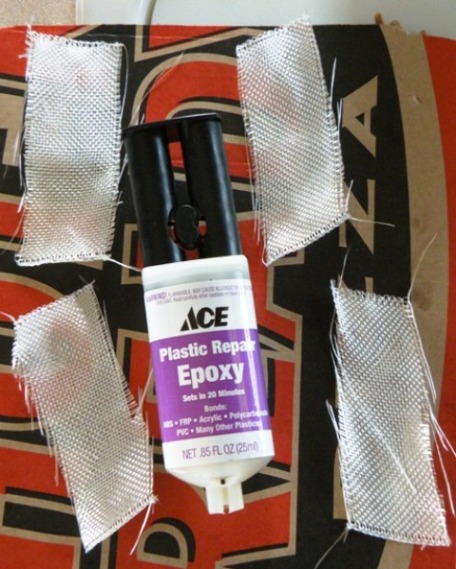
Fiberglass is a combination of glass cloth and epoxy resin... the glass cloth contributes a structural reinforcement to the epoxy resin. Combining those parts is what makes me have confidence in this RV Tank Repair.
I prepped the area with sandpaper... making sure I'd have a good surface for bonding. With that done I applied a coating of the mixed epoxy over the cracked area, about an inch wide.
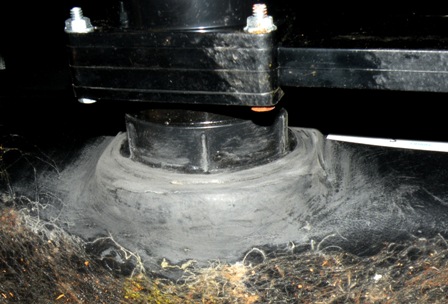
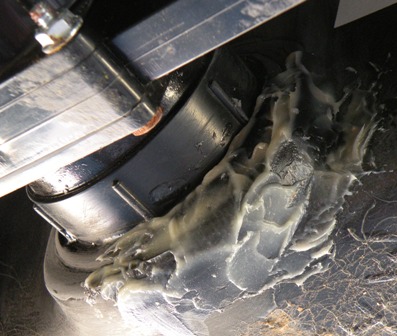
The small strips of fiberglass cloth were then pressed into the epoxy, and a second coating of epoxy was applied over the top to seal it in.
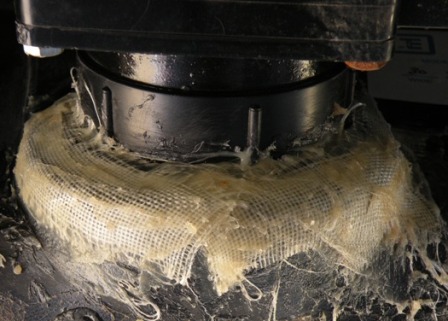
A day or so later... I decided to apply a second sealing coat of epoxy over the top. With the Hard Plastic formulated epoxy, biting into the ABS of the tank and fitting, and the fiberglass cloth, supporting the epoxy... I'm confident this RV Tank Repair will hold.
I had wanted to replace the Valterra dump valve while the belly of the rig was removed... Figuring they have maybe a 10 year lifespan... and my rig is... uh... 10 years old, it seemed like a good idea to do that, while doing this RV tank repair... but time and 'parts issues' got in my way... and that, stimulated my thinking parts a bit more... as I worked at replacing the insulation and belly pan.
...and caused me to build into the belly, what the manufacturer should have, when they built my Fifth Wheel... in '01... an access port, to allow convenient access to the valve... for replacement or maintenance!
Jayco had originally used regular, fiberglass batting insulation in the RV belly... a poor choice, I think. I replaced that, when I did the Mouse Invasion repairs, with thick, rigid, fiberglass insulation panels I had left over from our house construction. They're designed to be used for building HVAC duct work, and worked admirably for my RV belly installation... right up to the point they got saturated with sewage! Yuck!
This time... I ran on down to Home Depot... and picked up a few panels of a rigid, 3/4 inch, urea based insulation that's laminated between layers of reflective foil. That foil will reflect heat... Like the heat from your furnace... back into the rig in the winter? :o) ... and the poly insulation will keep the cold out pretty well...
I doubled them up to give me 1 1/2 inches of insulation in the belly... I'd like more... but that's about all the space I really had available between the final belly pan and the bottom of the tanks...
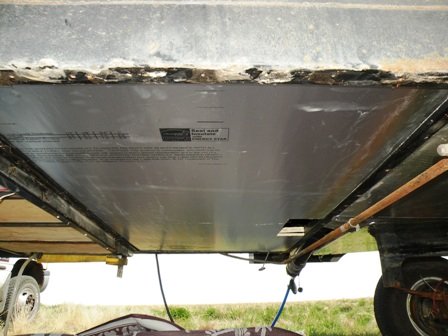
To seal that from the road... I replaced the cracking and failing, plastic, factory belly pan with a thin, moisture resistant, Luan Plywood, that is used as an underlayment for tile installations.
This I installed with new, self drilling hex head screws, adding wider support with small washers, to help prevent the heads being pulled through the panels over time.
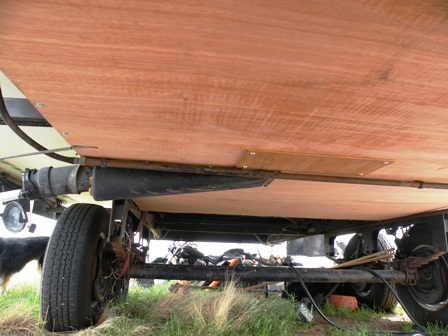
As I said earlier, as I was rebuilding the the insulation and belly pan of the Fifth Wheel, after completing this RV waste tank repair, I built in an access port, to allow me to get back to the dump valve... and even inspect my repair on occasion... without having to remove the entire Belly again.
You can also see the final Luan Cover for the access port, in the picture of the Luan Plywood Belly pan above...
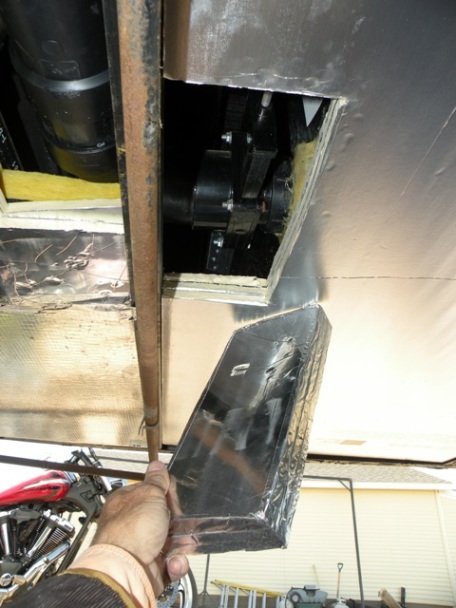
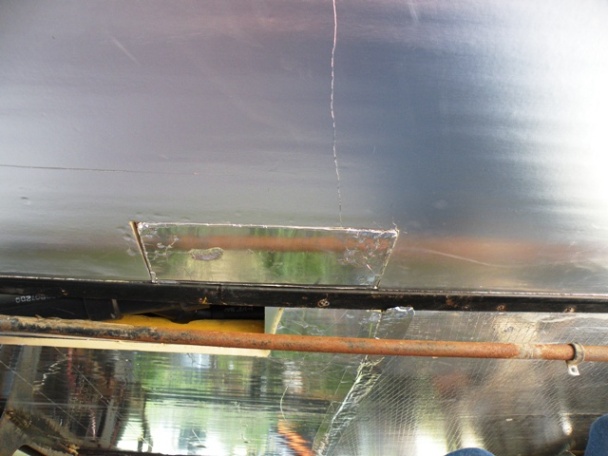
... unless of course... I was unfortunate enough to have a second failure that required another... RV Tank Repair... and total RV Belly rebuild!
Finally, to seal off that moisture resistant plywood, and make it water proof... I applied a rubberized, spray on, undercoating... bought at the same good Ol' Ace Hardware that I got the rest of my RV Tank Repair materials...
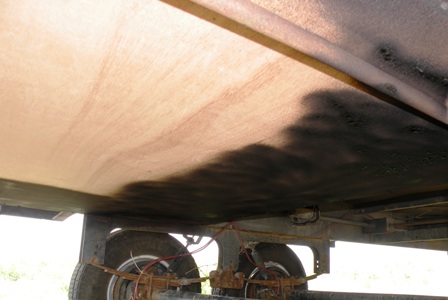
As much fun as RV Tank Repair can be... Here's hoping this will be my last such fun in the Sun!
Return from RV Tank Repair to Goin' RV Boondocking


